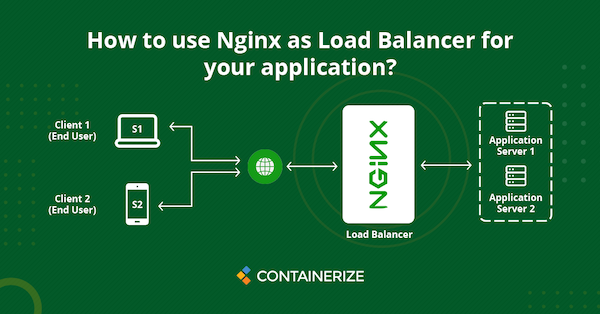
Nginx as Load Balancer
NGINX is a popular open-source web server and reverse proxy that is often used as a load balancer for high-traffic websites. In this blog post, we will provide an example of how to set up an NGINX load balancer to distribute incoming requests among multiple backend servers.

To begin, we need to have at least two backend servers that are running the same application. For our example, we will assume that we have two web servers, each running an Apache web server and hosting a PHP application.
The first step is to install NGINX on a separate server that will act as the load balancer. Once NGINX is installed, we need to configure it to distribute incoming requests among the backend servers. To do this, we need to edit the NGINX configuration file (usually located at /etc/nginx/nginx.conf) and add the following settings:
upstream backend {
  server 192.168.1.10;
  server 192.168.1.11;
}
server {
  listen 80;
  server_name www.example.com;

  location / {
    proxy_pass http://backend;
  }
}
In this example, the upstream directive defines a group of backend servers that will receive incoming requests. In our case, we have specified two backend servers with the IP addresses 192.168.1.10 and 192.168.1.11.
The server directive then defines the settings for the load balancer itself. In this case, we are listening on port 80 and using the domain name www.example.com as the server name.
Finally, the location directive specifies that all incoming requests should be forwarded to the backend servers defined in the upstream block.
Once these settings are saved and NGINX is restarted, the load balancer will begin distributing incoming requests among the two backend servers. This can be tested by accessing the website using the domain name specified in the server_name directive.
In summary, setting up an NGINX load balancer is a simple and effective way to distribute incoming requests among multiple backend servers, improving the overall performance and scalability of a web application.
\m/